Classified Billing offers you to set up CNAME to enable this app 100% white label so that when you use it, it makes you feel that you own the app.
So let’s make the app white label step by step:
First, go to your domain control panel that you want to use to white label the app.
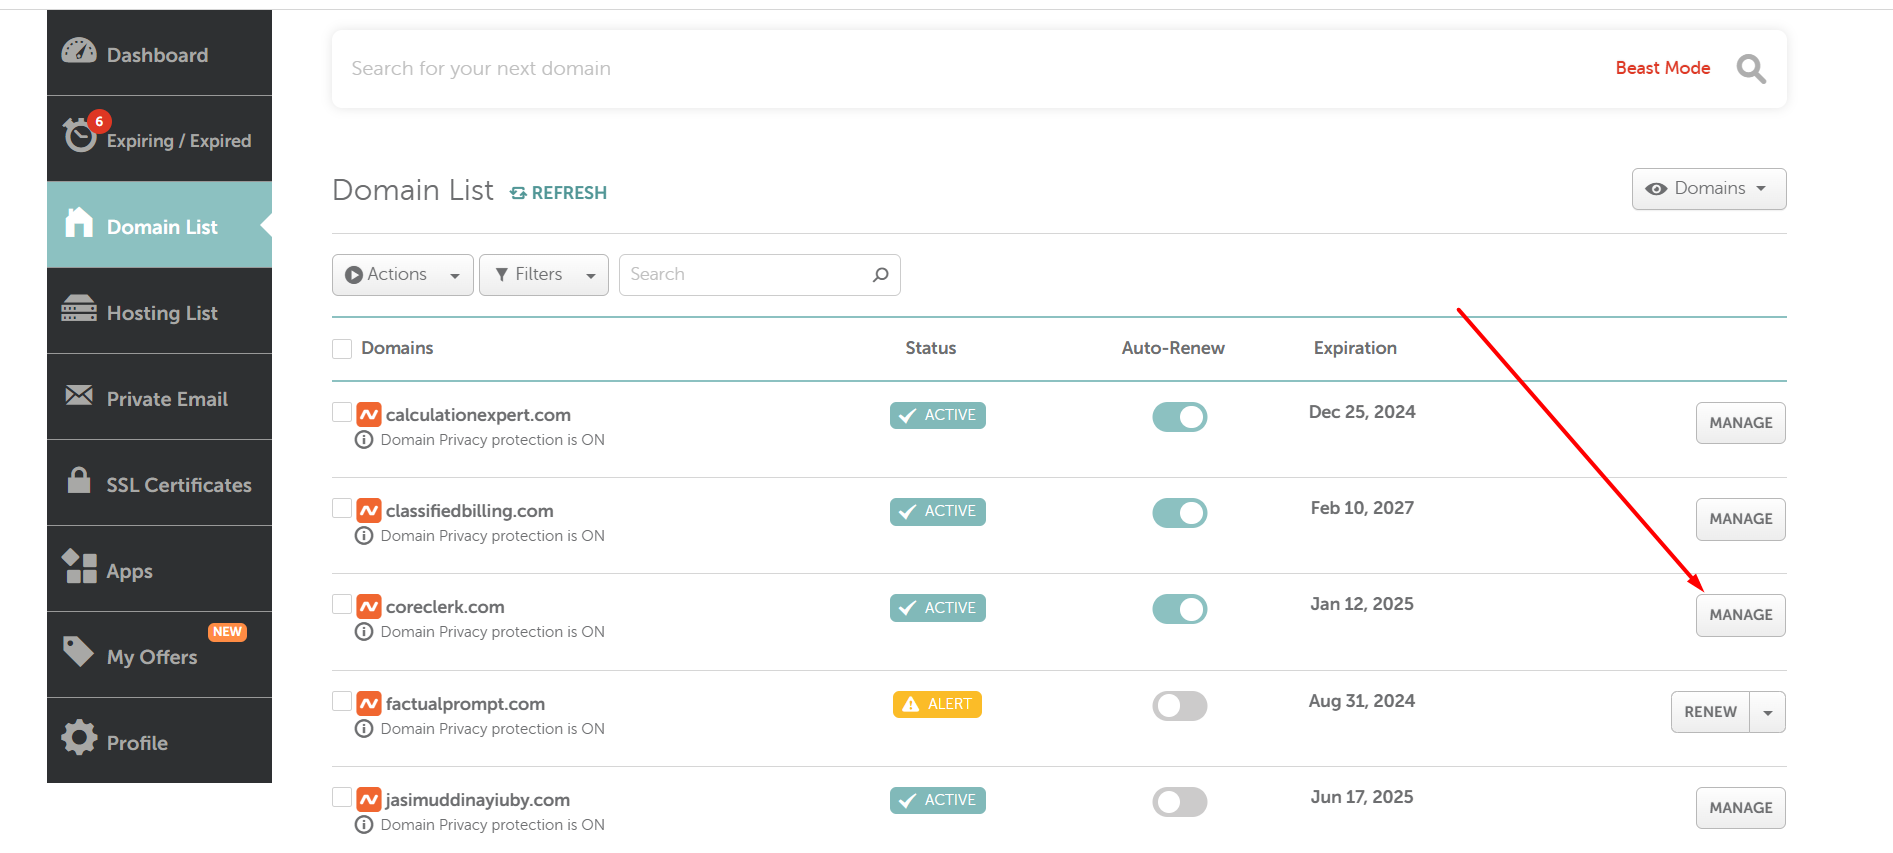
Assuming you have a domain on Namecheap, so log in to your Namecheap account, click on the domain list menu from the left sidebar, then click on the Manage button for the domain that you want to use.
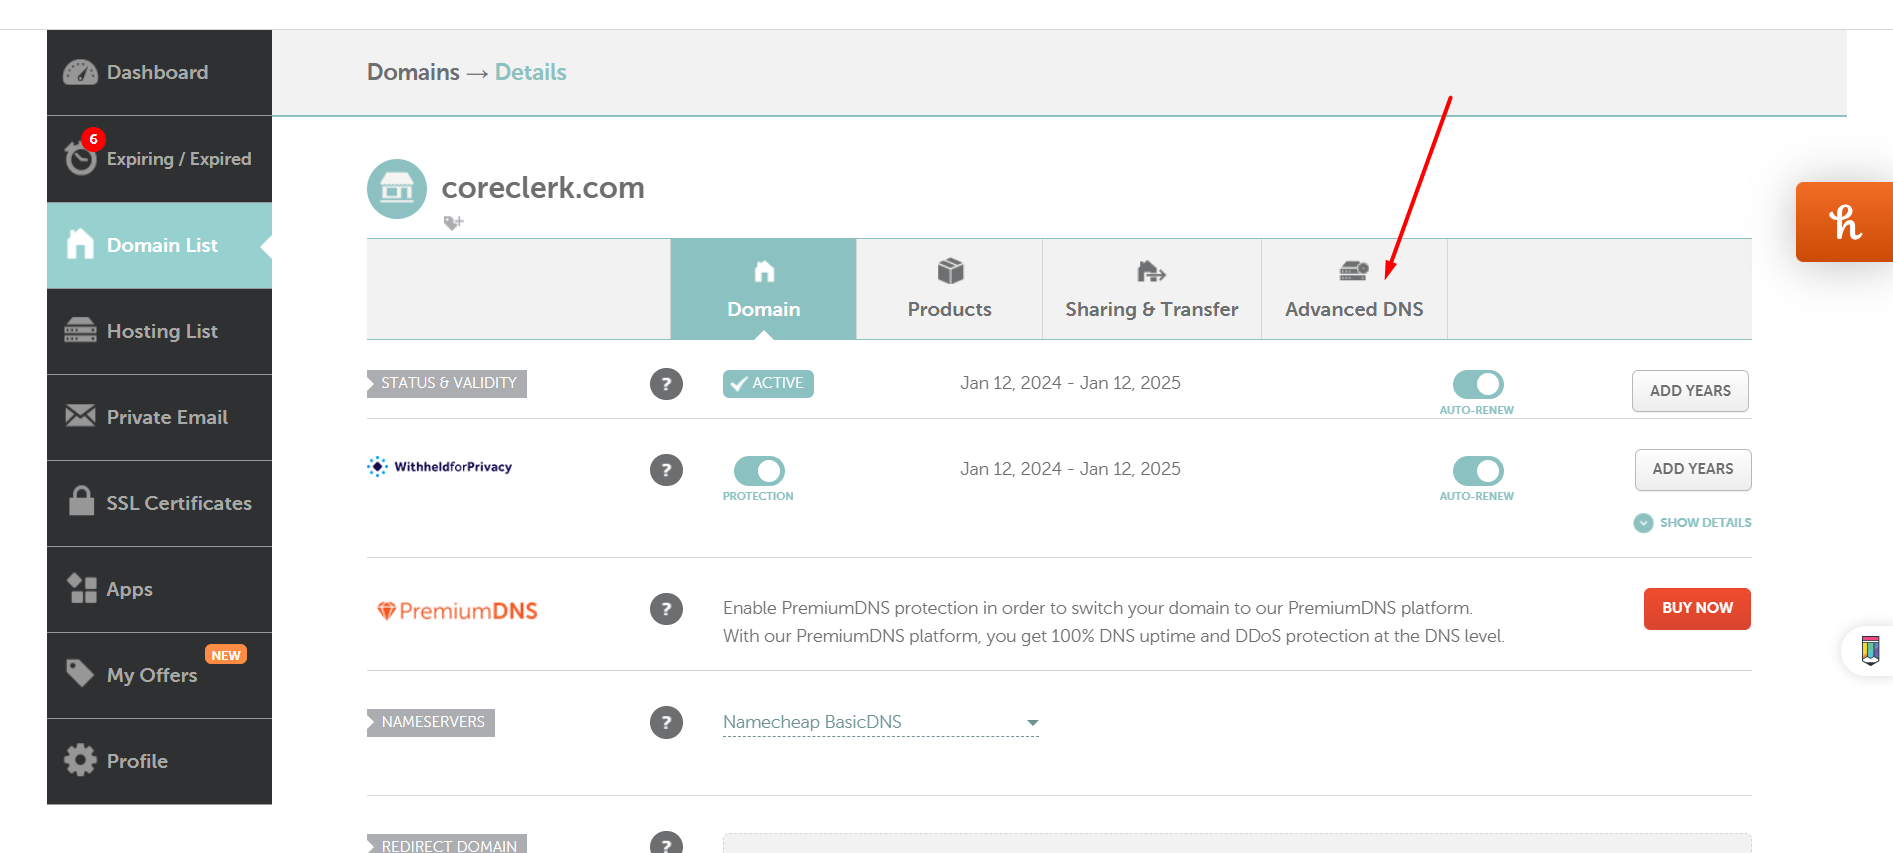
Now you can see the Domain control panel page like the screenshot below, then click on the Advance DNS tab.
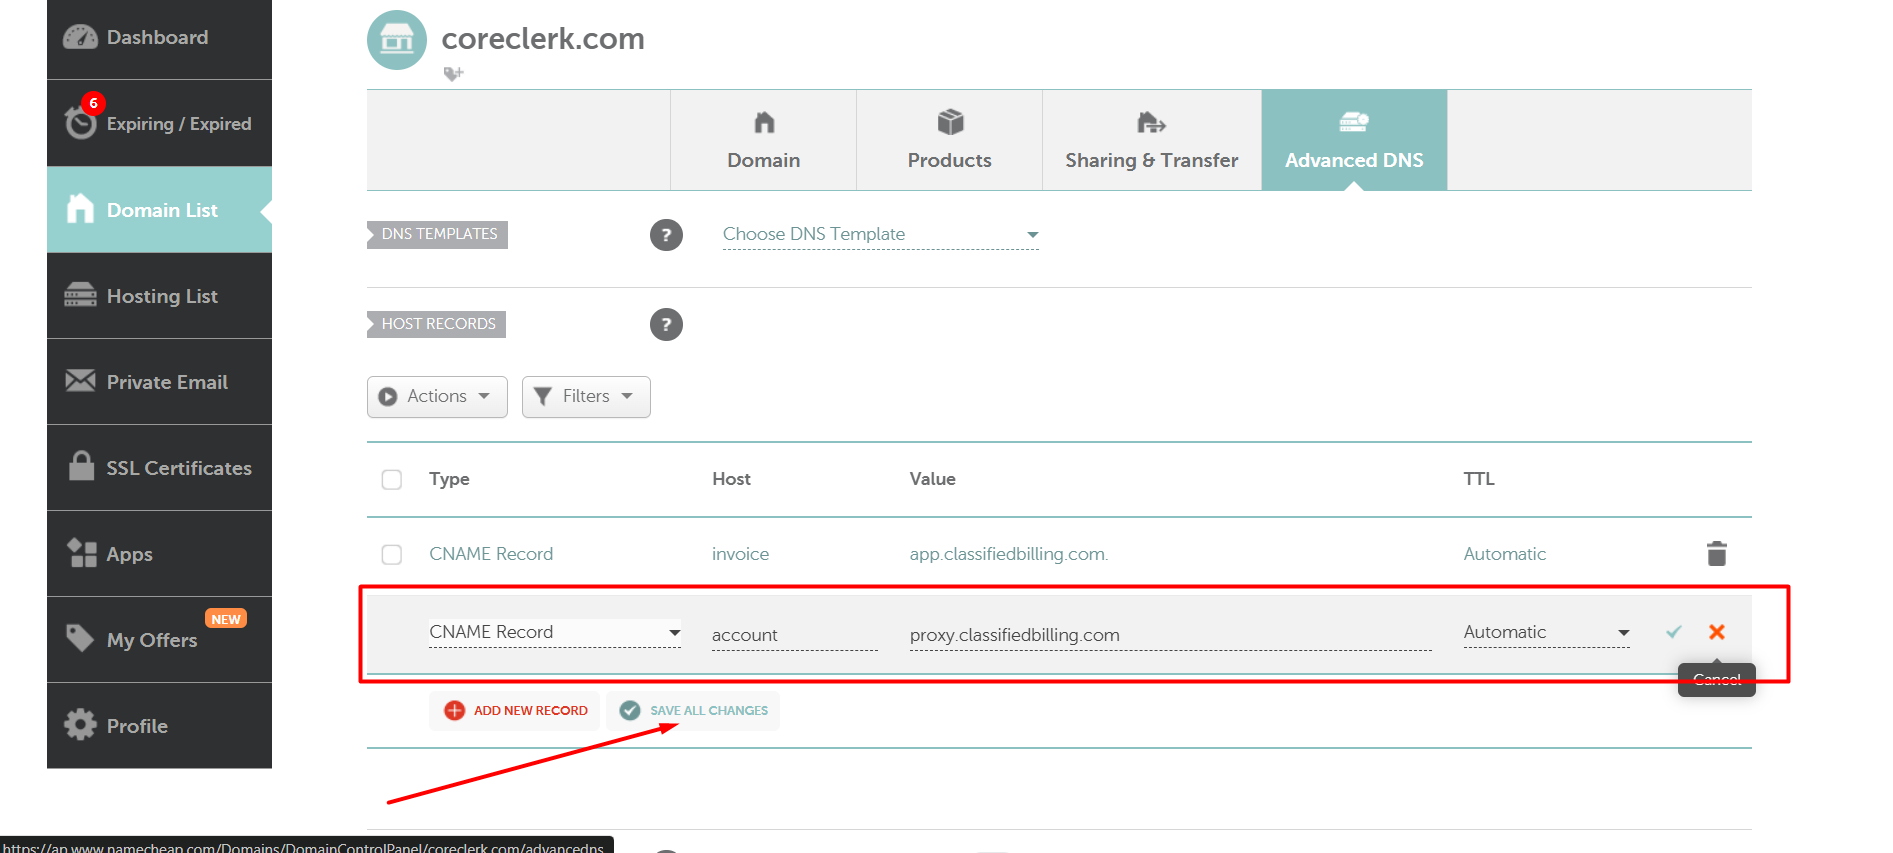
In the Advance DNS tab, click on the Add New Record, from the dropdown pick CNAME Record, for the host field add your desired subdomain name.
Let’s say your domain name is example.com. If you wish to use or browse the application with the name of account.example.com, simply input “account” in the host field.
In my situation, because my primary domain is coreclerk.com, and I’m using an account on the host field, I will be able to browse it with the URL of account.coreclerk.com after setting up the white label. I hope this step is clear to you.
Use proxy.classifiedbilling.com as the target domain for the value field. Keep the TTL as automatic. Finally, click on the Save All Changes button.
DNS changes usually take 2 to 5 minutes to propagate, but sometimes they can take longer to update completely.
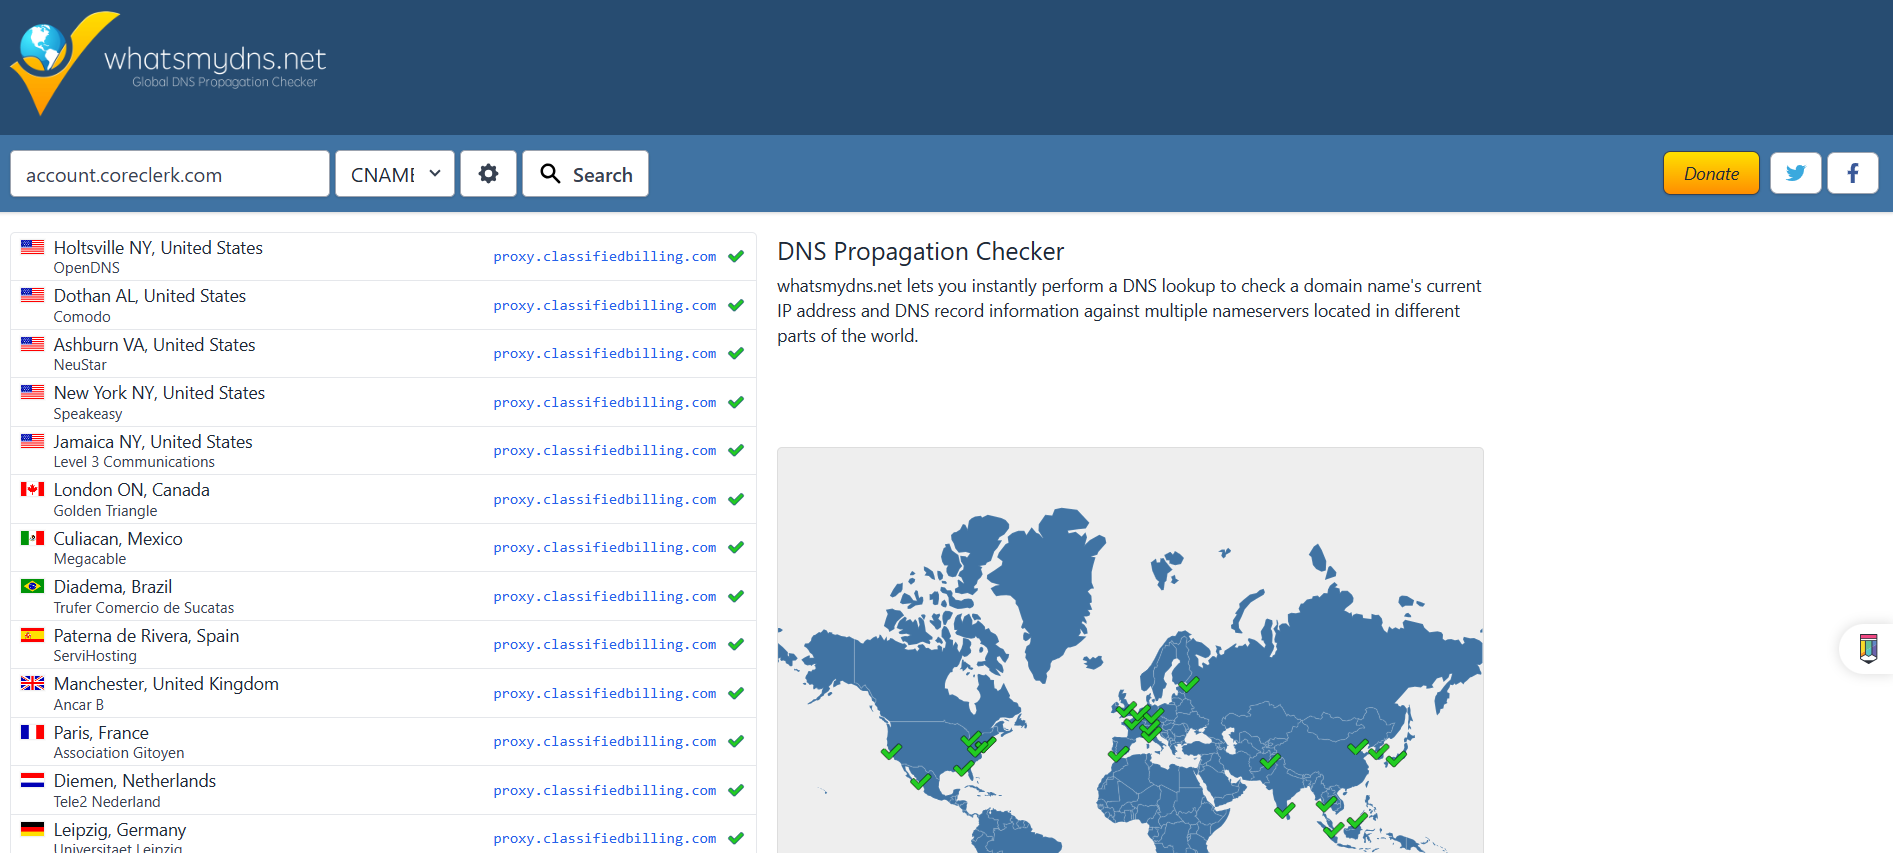
Verify if the DNS has been updated using www.whatsmydns.net. In my case, I have confirmed that the DNS for the CNAME Record has been successfully changed to proxy.classifiedbilling.com.
Once you’ve updated your DNS, it’s time to login app.classifiedbilling.com. If you’re not already logged in, do so now. Next, navigate to the profile icon, where you’ll find a range of profile menus. Select the CNAME/ White Label menu.
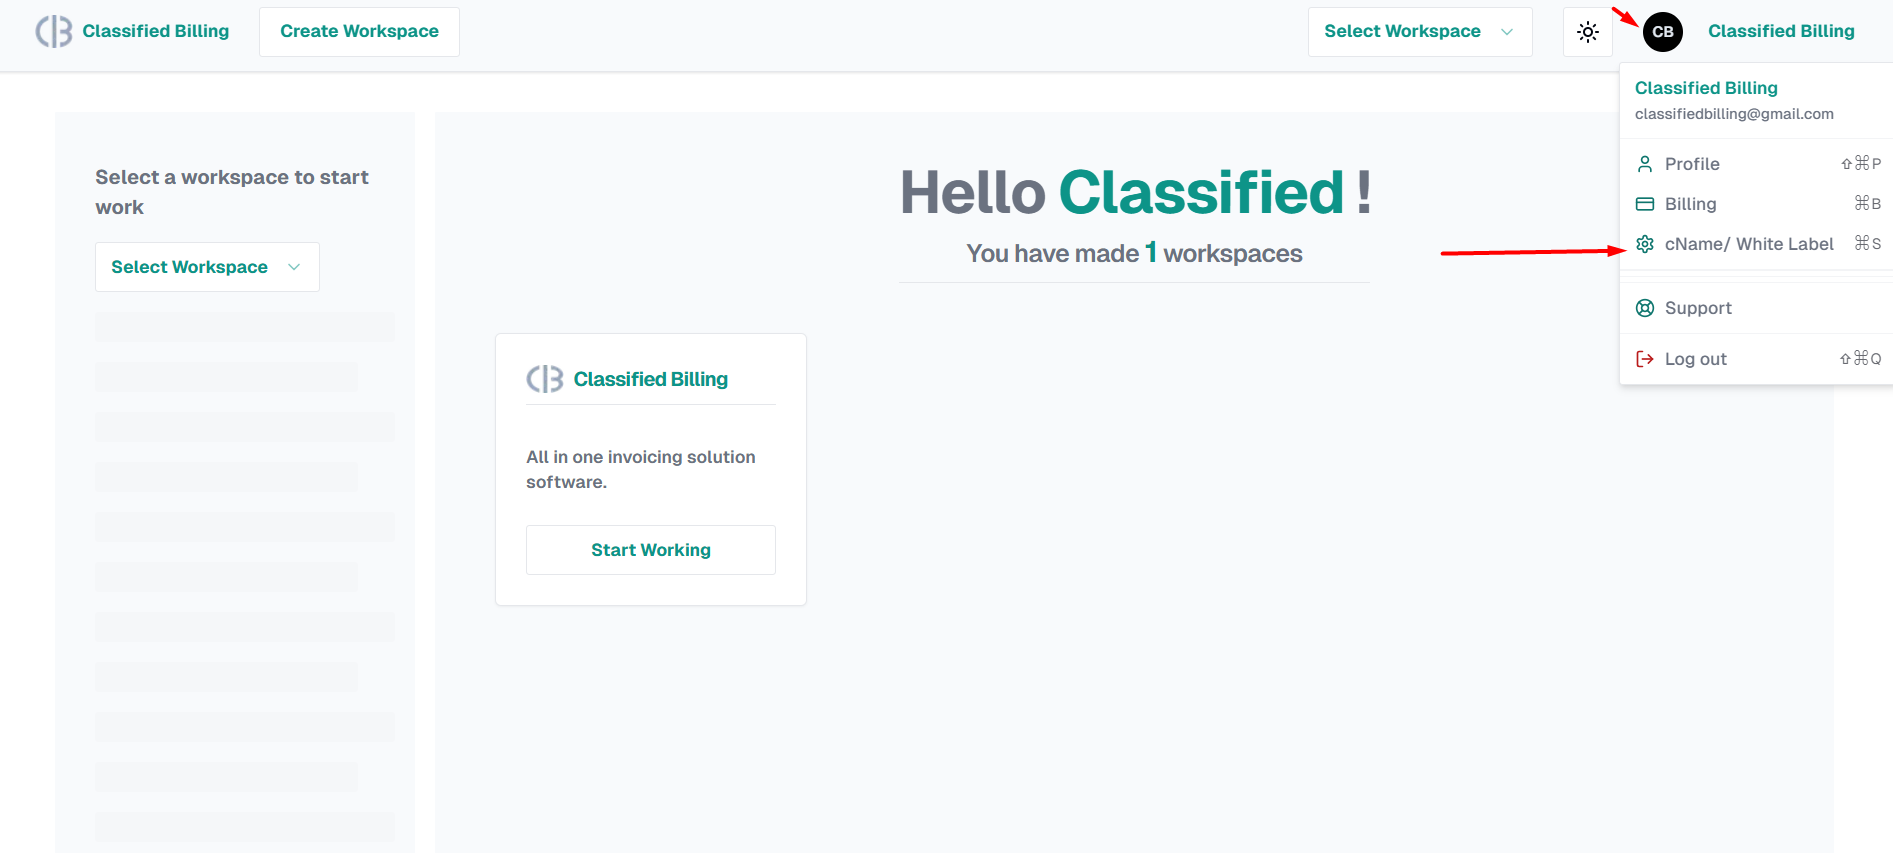
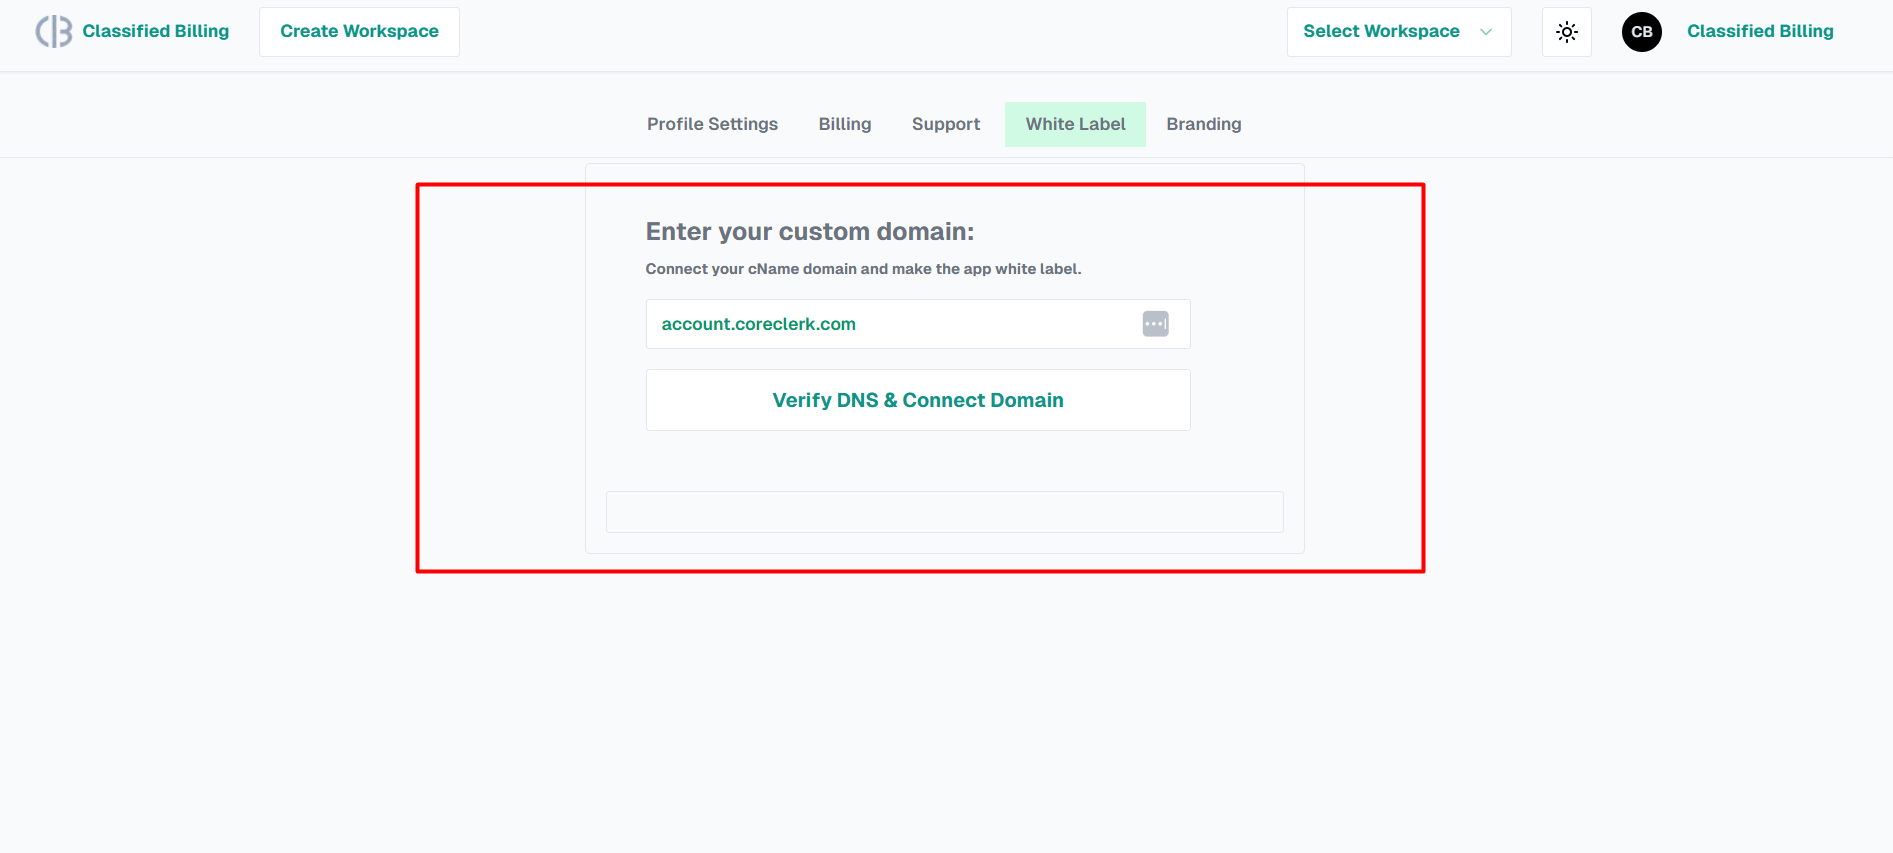
You’re on the next page. To validate the DNS connection in our app and save it in the database, please add the subdomain you previously set up as “account.coreclerk.com” and then click on “Verify DNS & Connect Domain“.
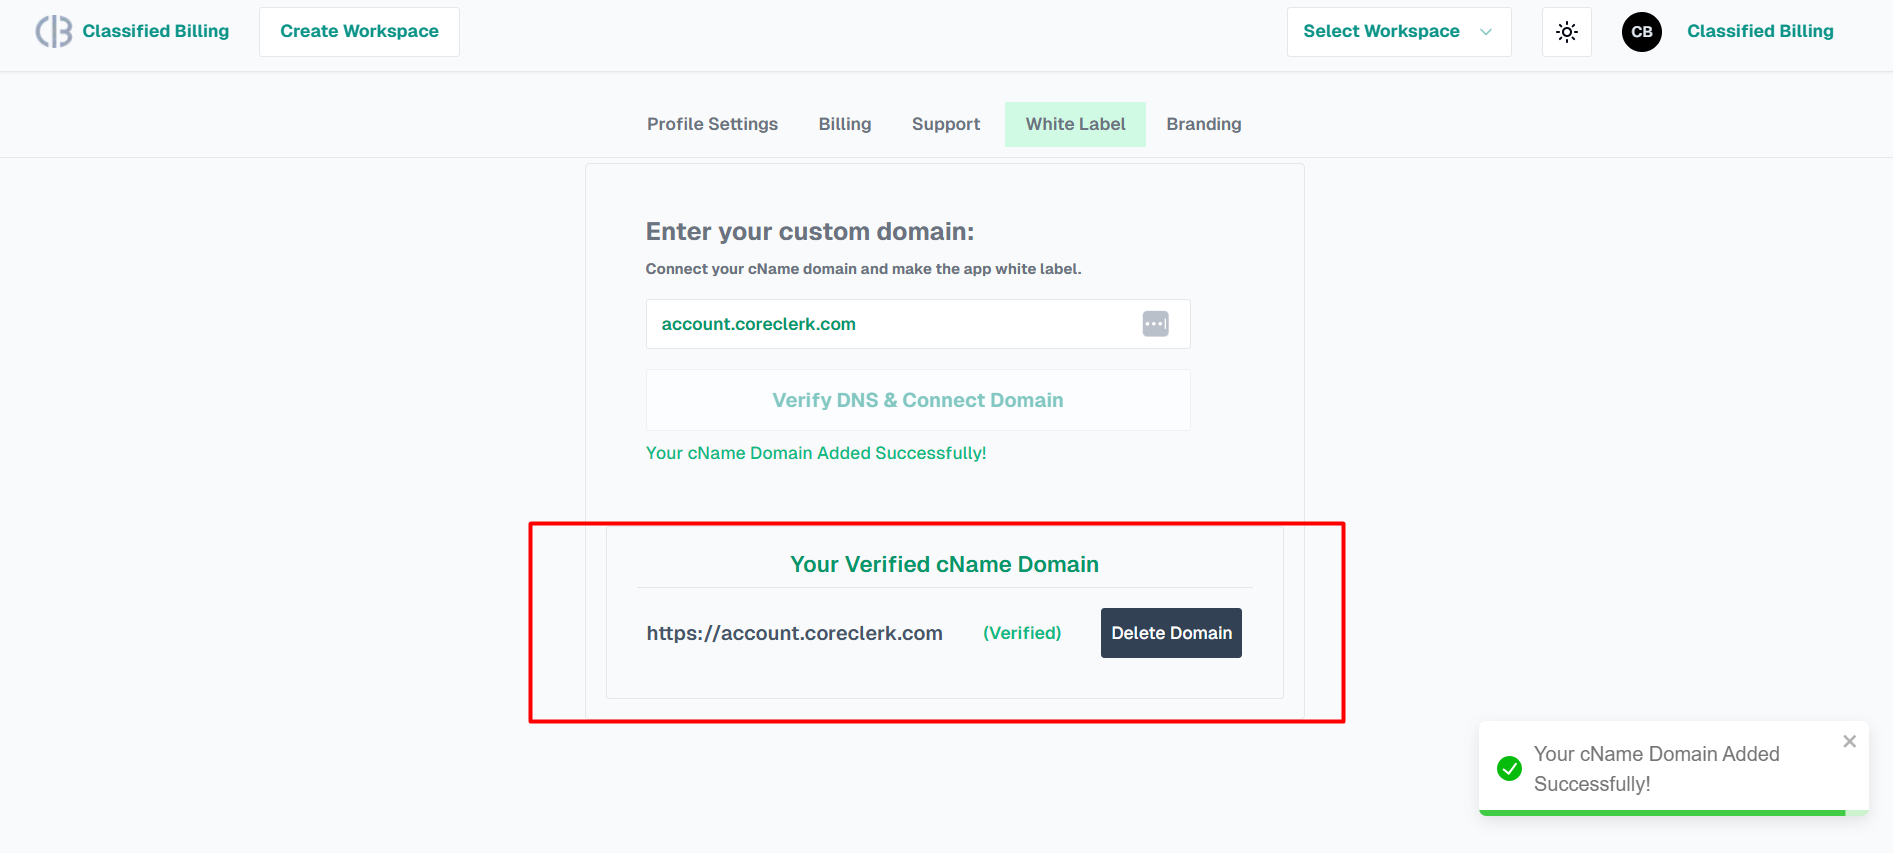
Once the domain is verified, you will see a success message and the domain name displayed below the verify button.
To fully customize the app with your own branding, access the branding tab, where you will find the following page.
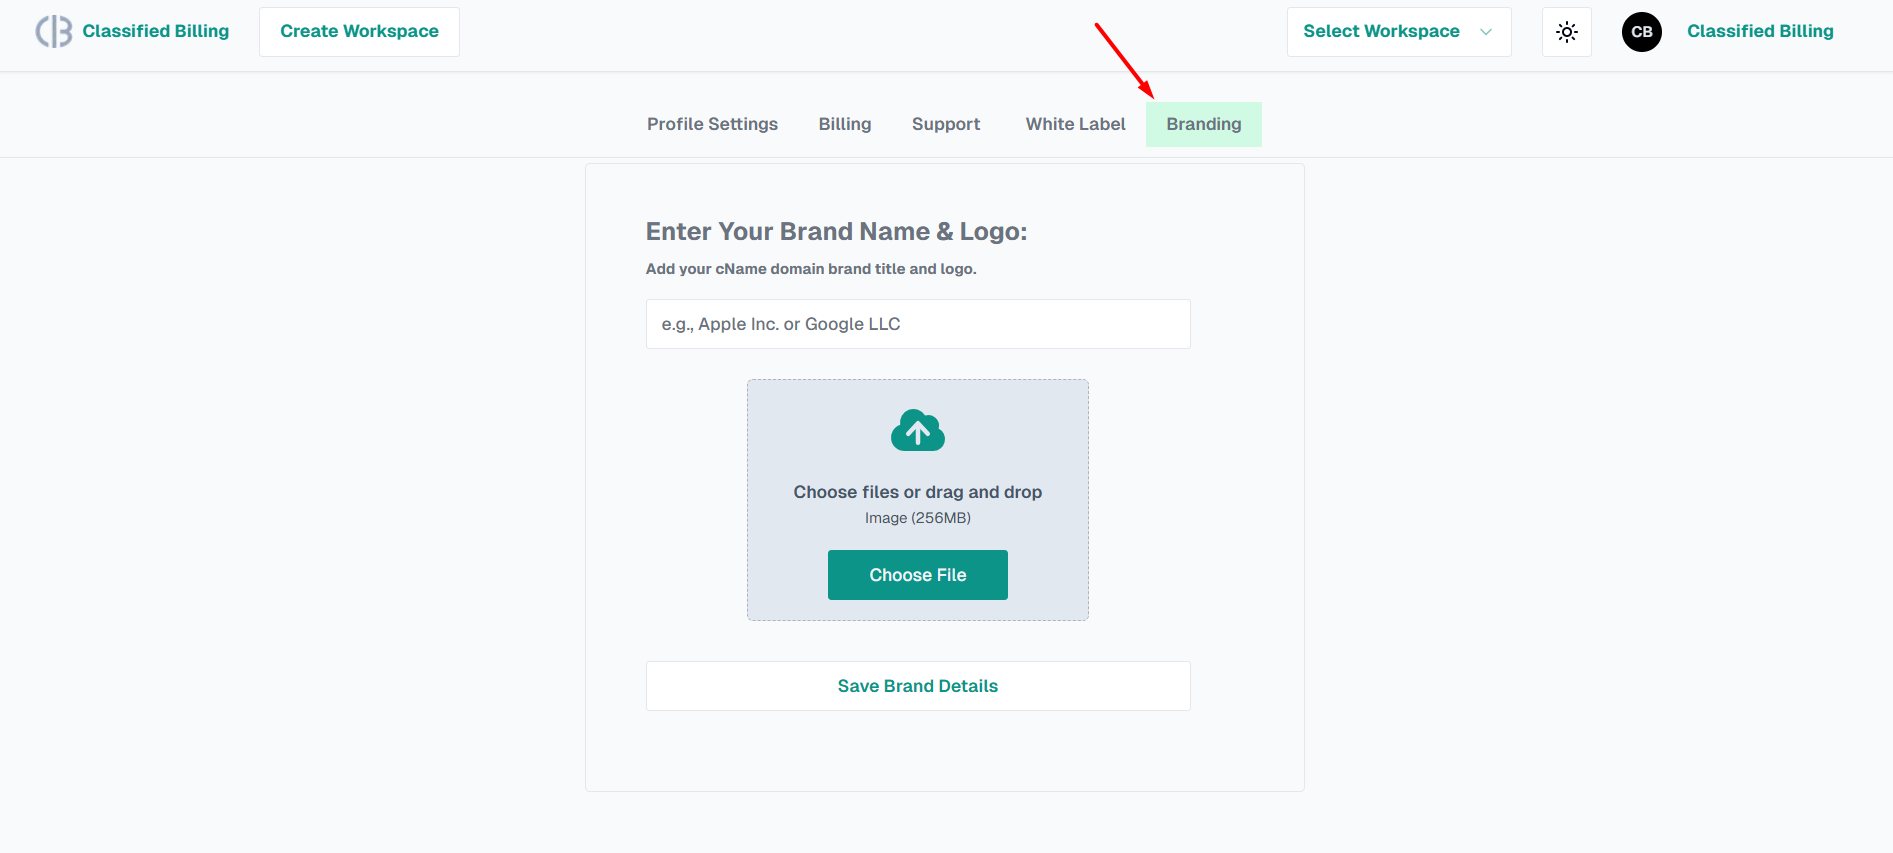
Please add your brand name, upload the logo, and save the brand details. You will then be able to see that the brand details have been successfully added.
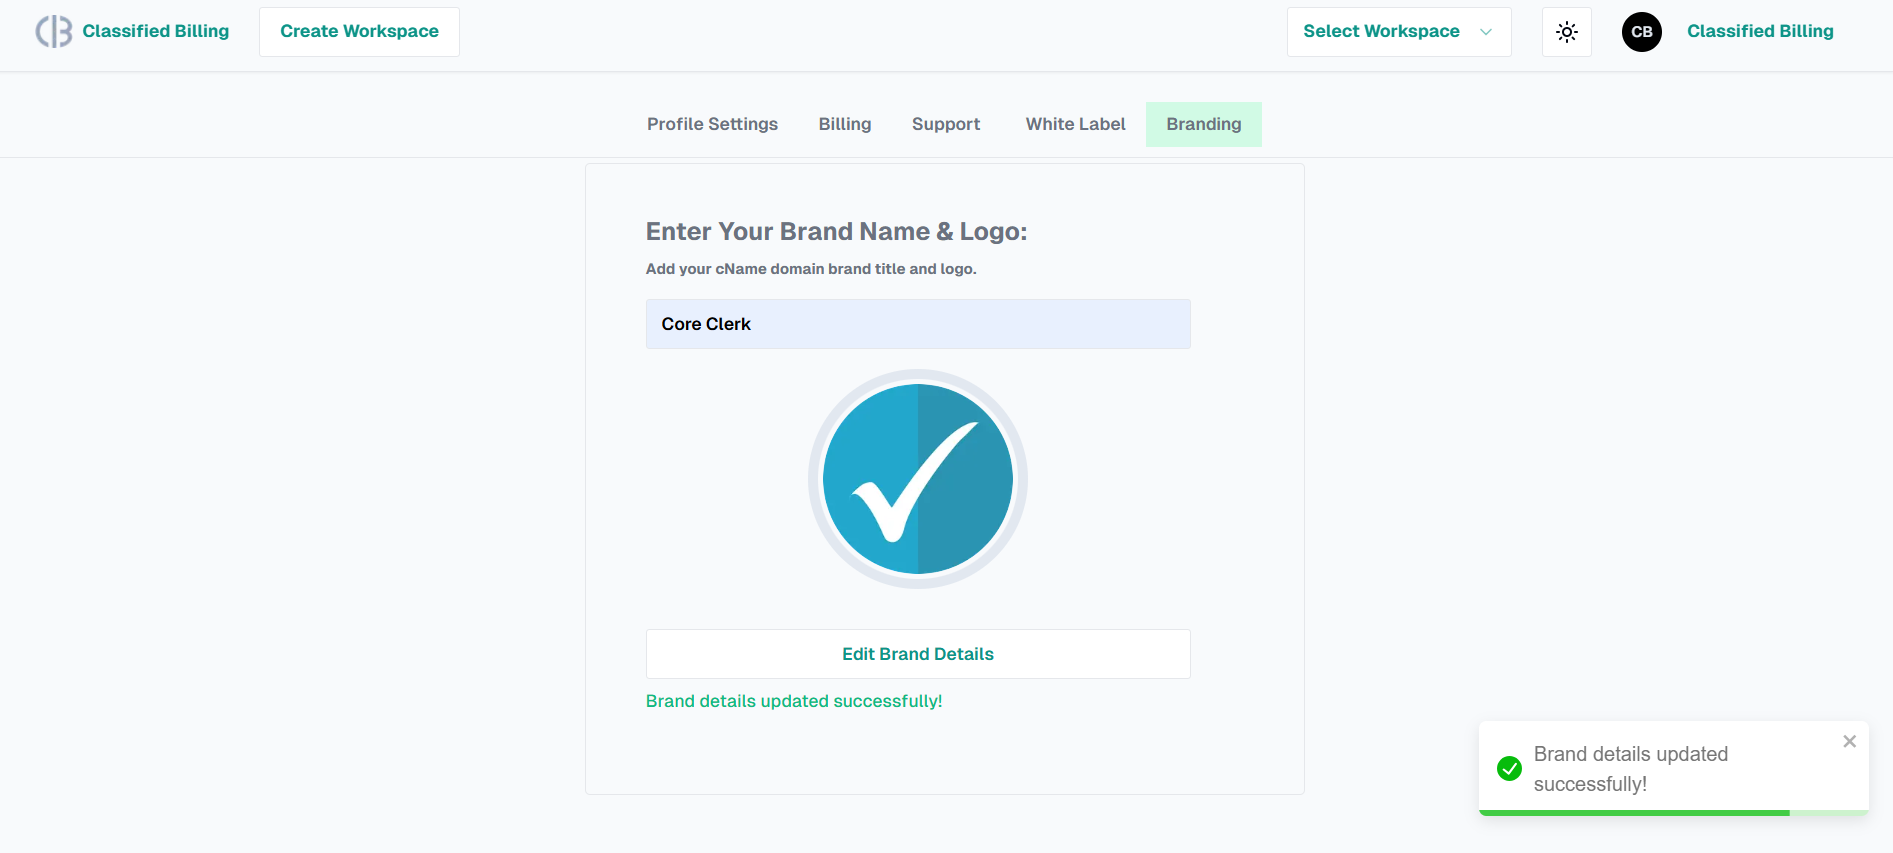
Congratulations! You have now successfully customized our application into a white label version exclusively for your use. By using the app, you can now enjoy a custom domain URL to enhance your white label experience.
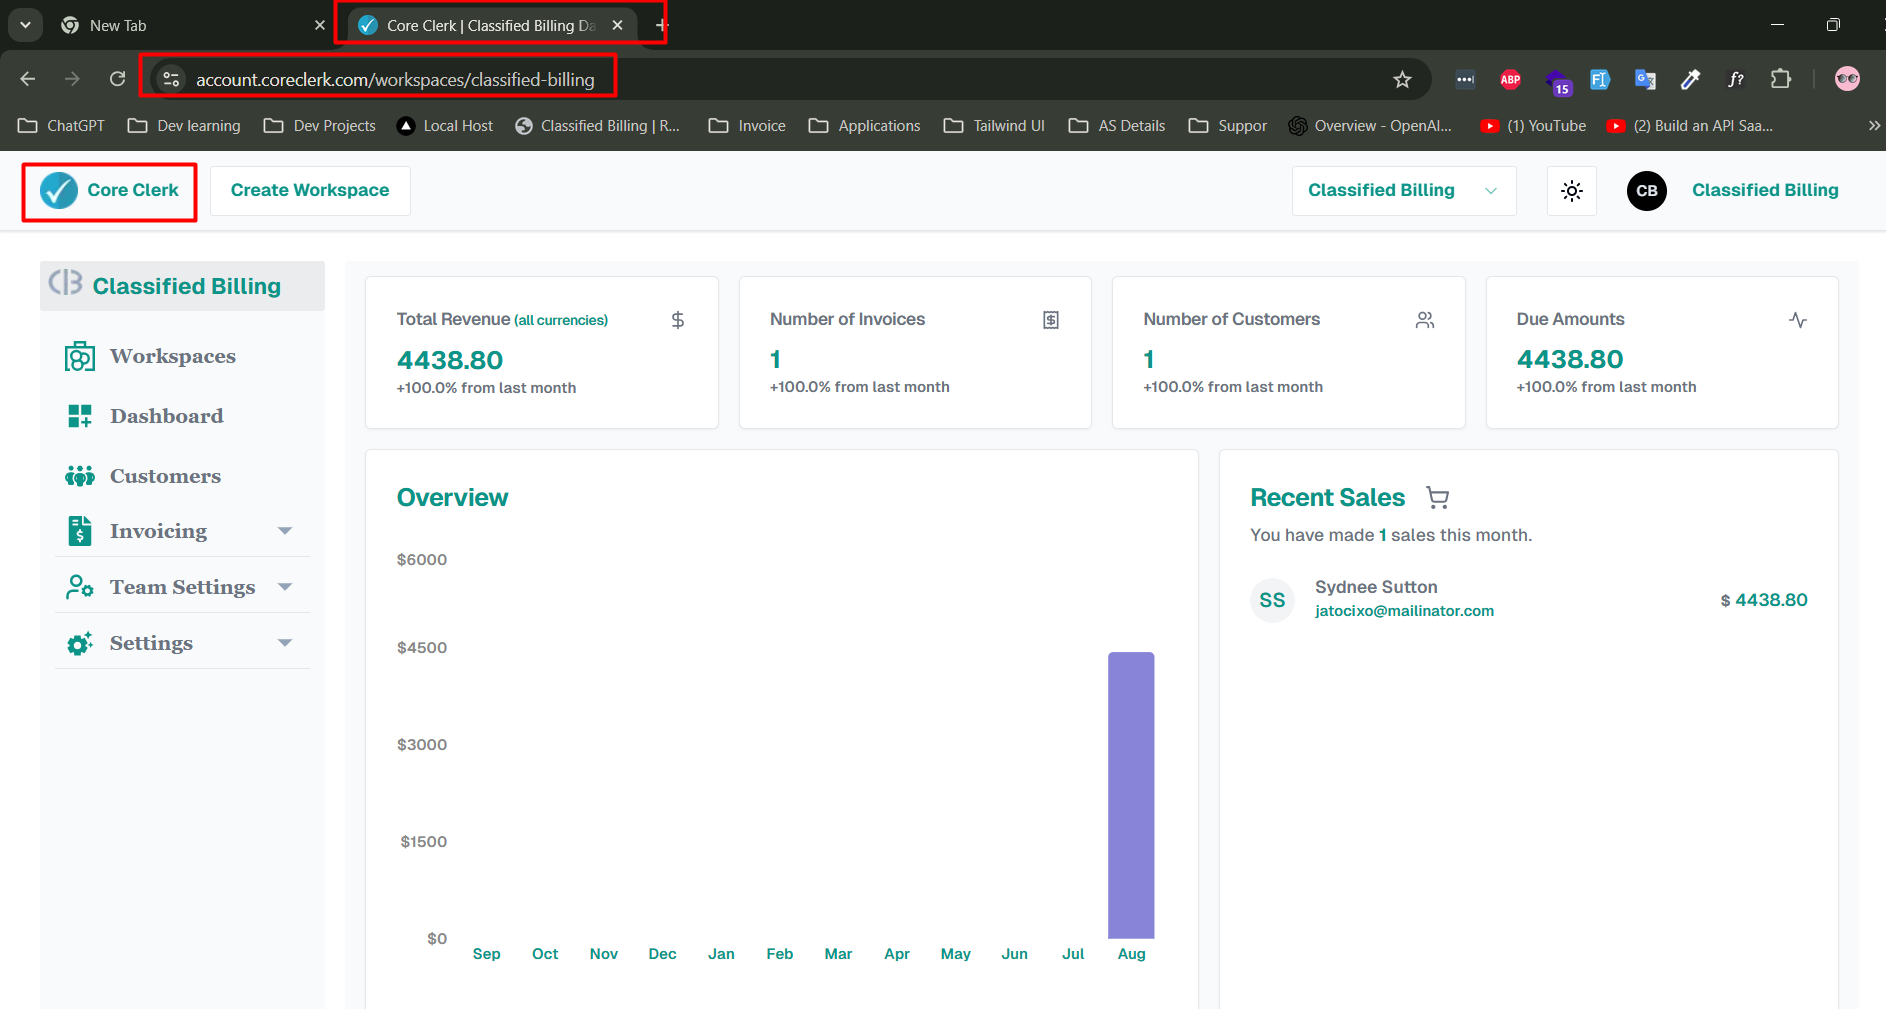
Currently, I am accessing account.coreclerk.com instead of Classified Billing, and I can clearly see that the name, logo, and other details have been updated to reflect the brand data I provided.
The login page has been updated with a new-look following the implementation of the white label.
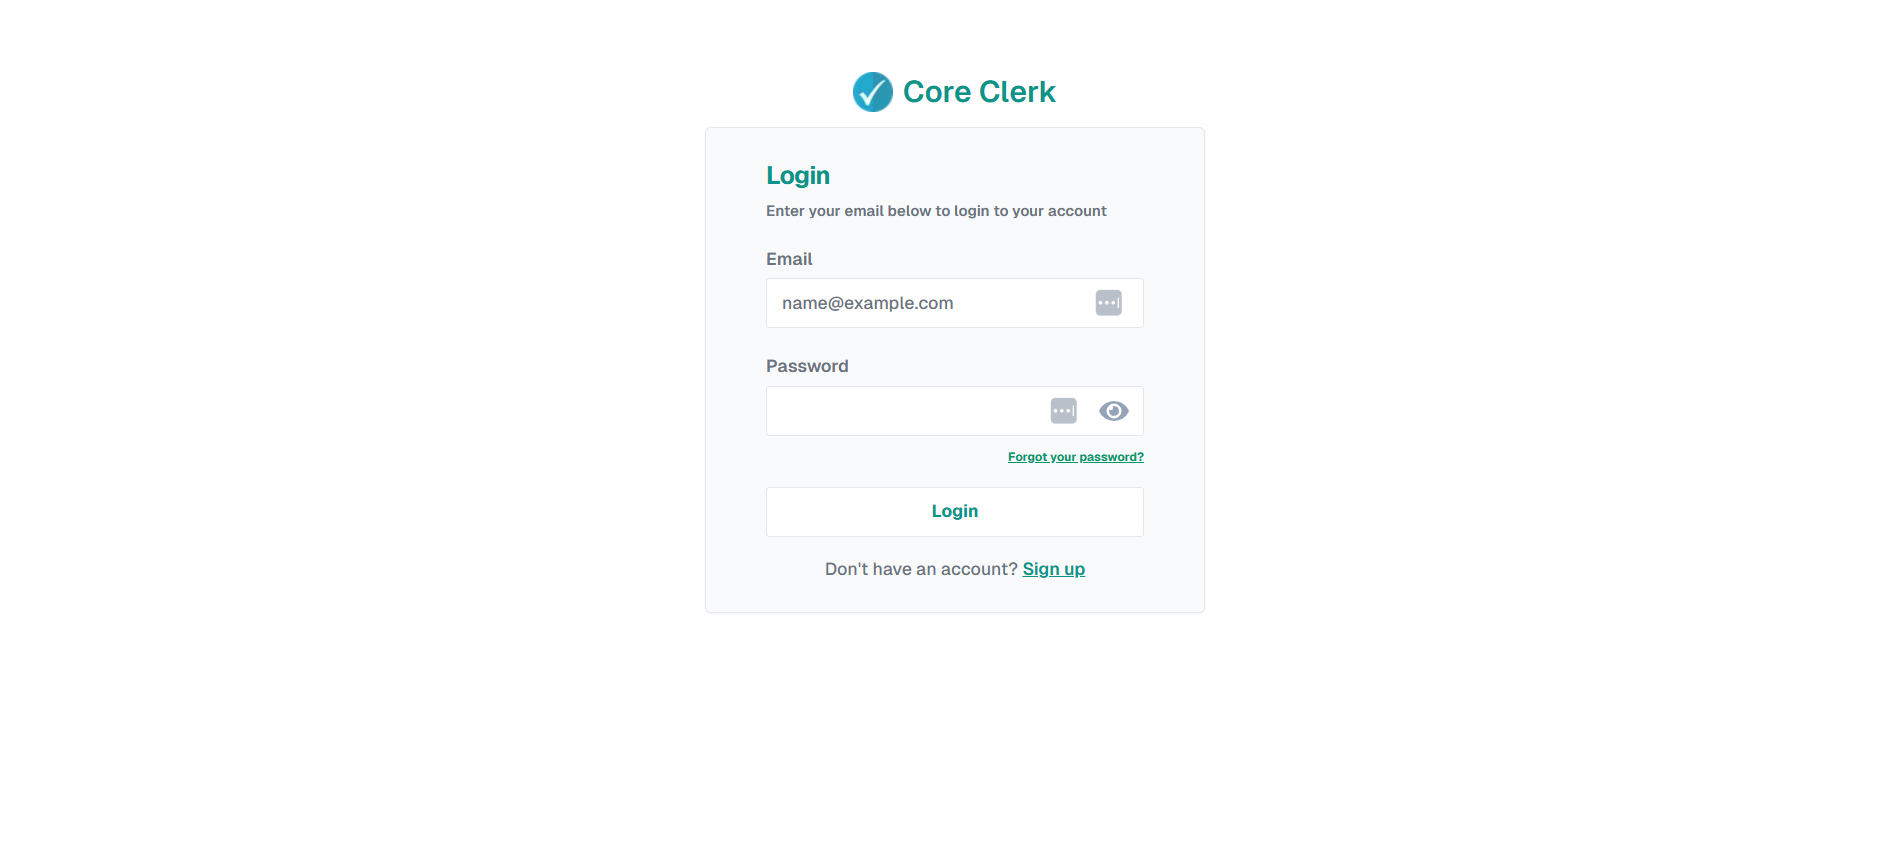
Once you log in with the new white label URL, your own brand details will be automatically applied for the Favicon, Logo, Brand Name, and Page Title, giving your platform a consistent and professional look.
Good luck to you and your business.


