With Workspaces custom SMTP setup, you can use your own sending email to send invoices to your customers. This helps improve your trust score with clients.
Now let’s set up your custom SMTP step by step.
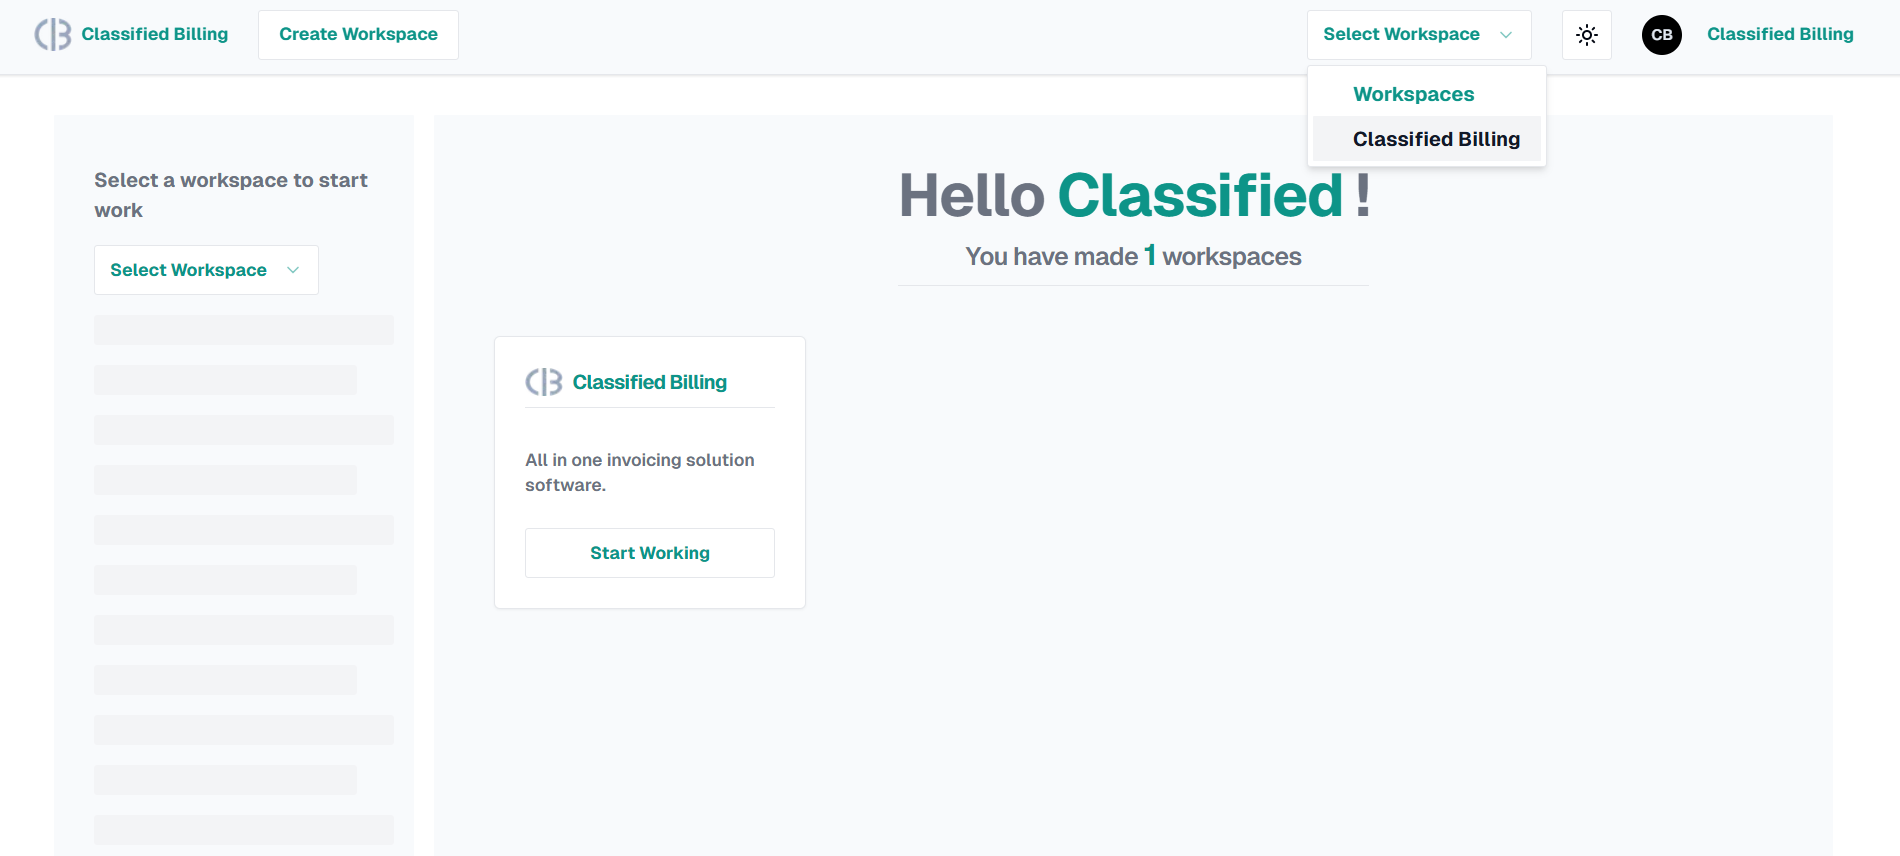
Select your desired workspace where you want to set up custom SMTP:
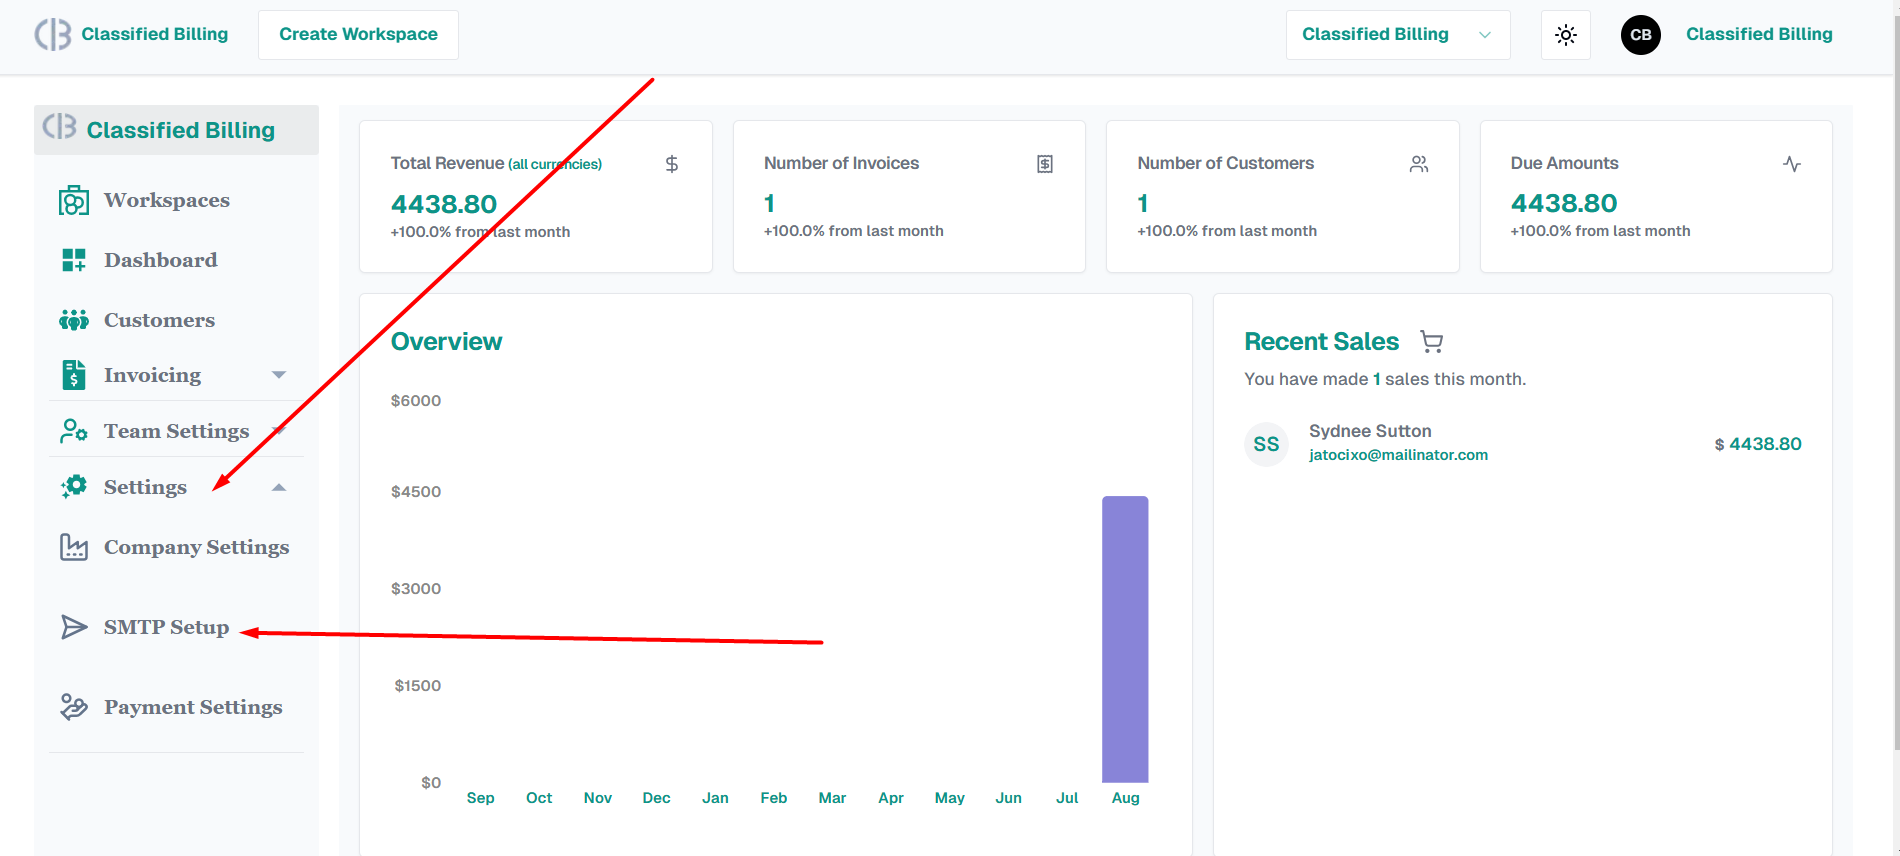
Click on the Settings toggle on the left sidebar then click on the SMTP Setup menu.
Once you click on the SMTP Setup menu, it will open the page to fill in the SMTP data like below.
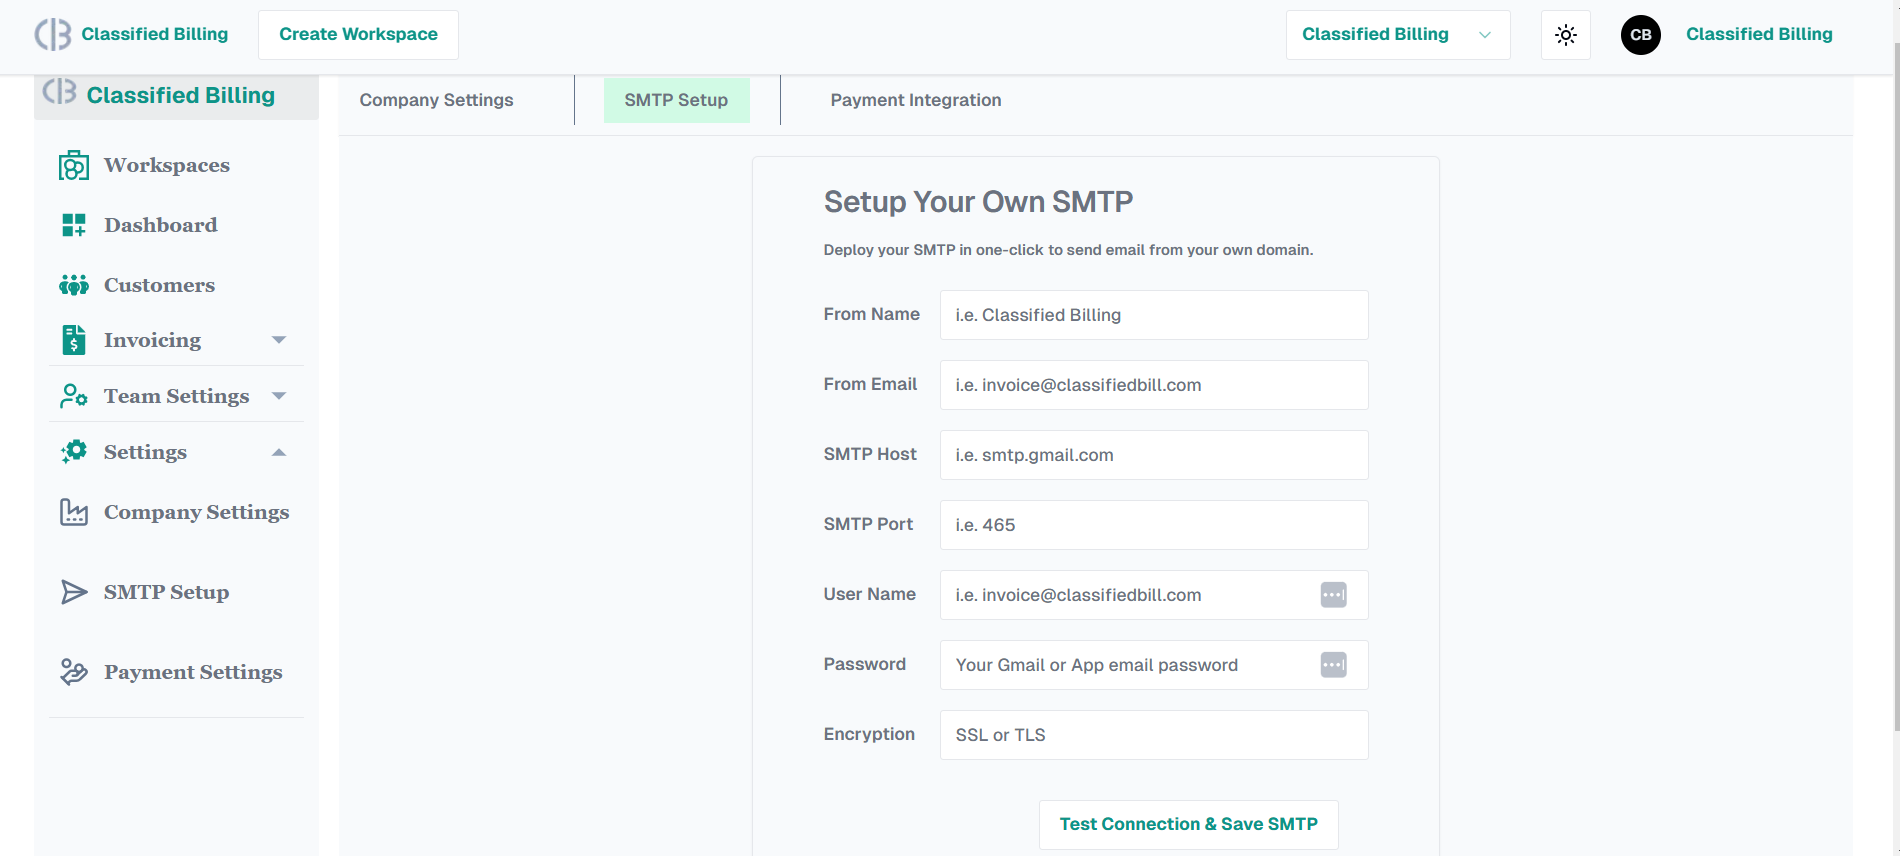
Now fill out the form with the necessary data, in the field of From Name that can be your business name or whatever you want to add, for the From Email field, add your sending email.
If you are using Gmail or GSuite Email, then add smtp.google.com in the field of SMTP host and 465 for the SMTP Port, for the User Name field, add your sending email again.
Enter your email or Gmail password in the password field. However, please note that if the email you are using for the SMTP connection has 2-factor authentication enabled, your default email password will not work.
In that case, you have to create an App Password from the Gmails settings page.
Now let’s generate an App Password.
Open your Gmail and click on the profile icon of your Gmail and select Account.
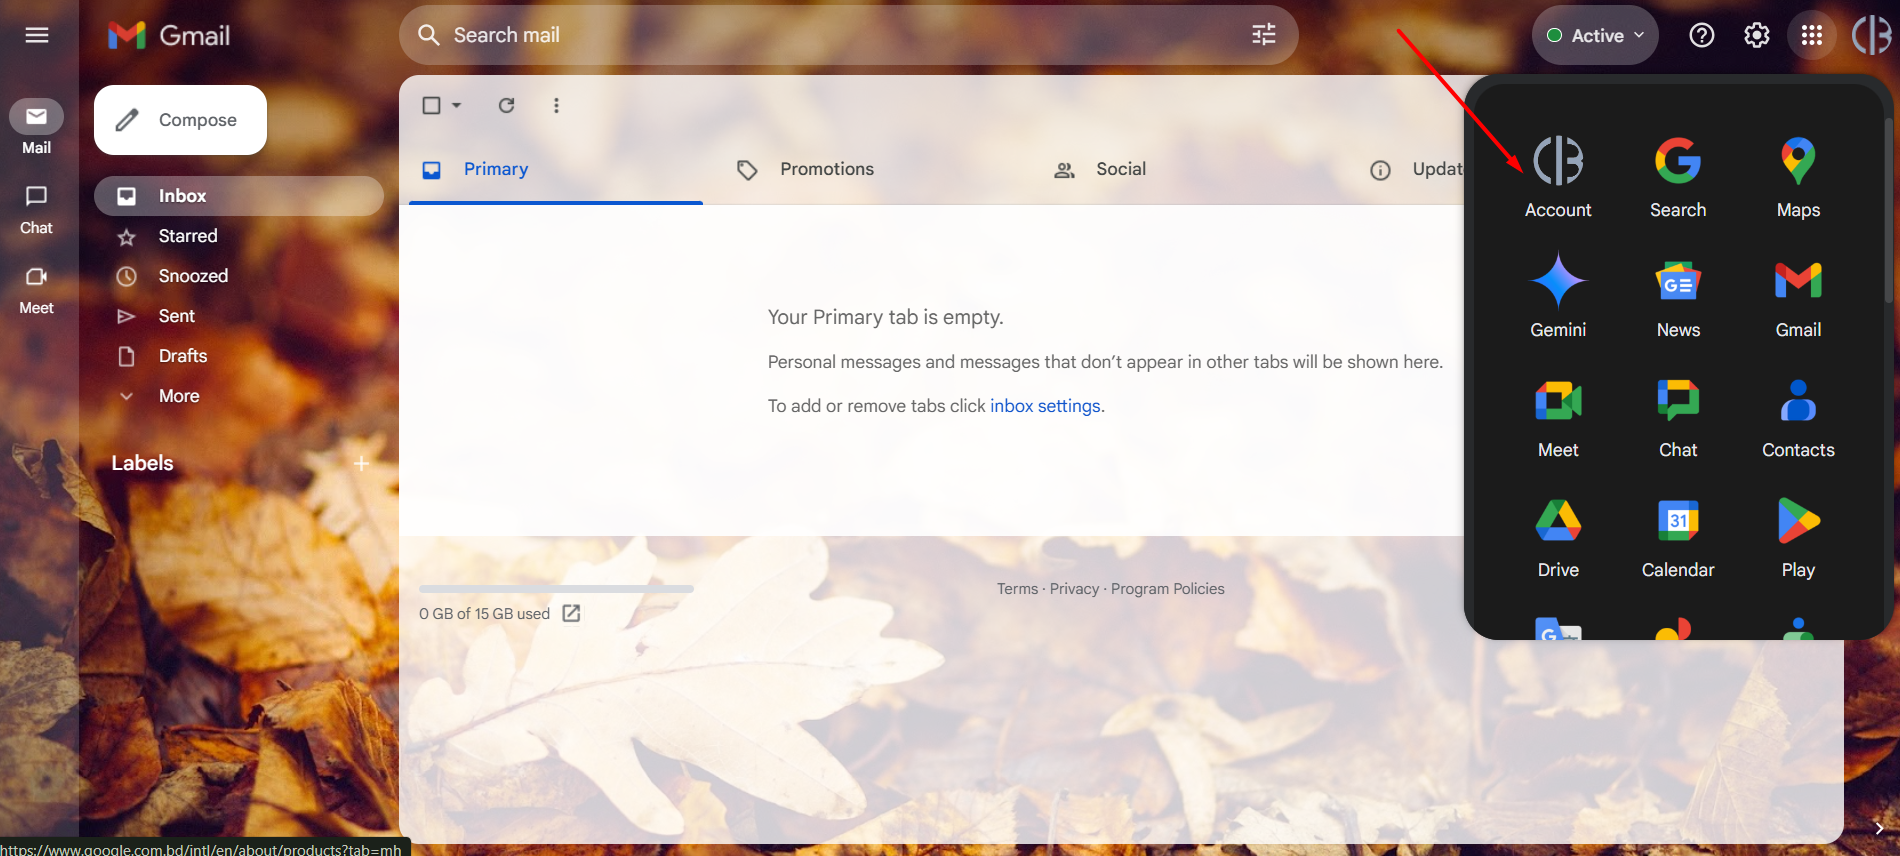
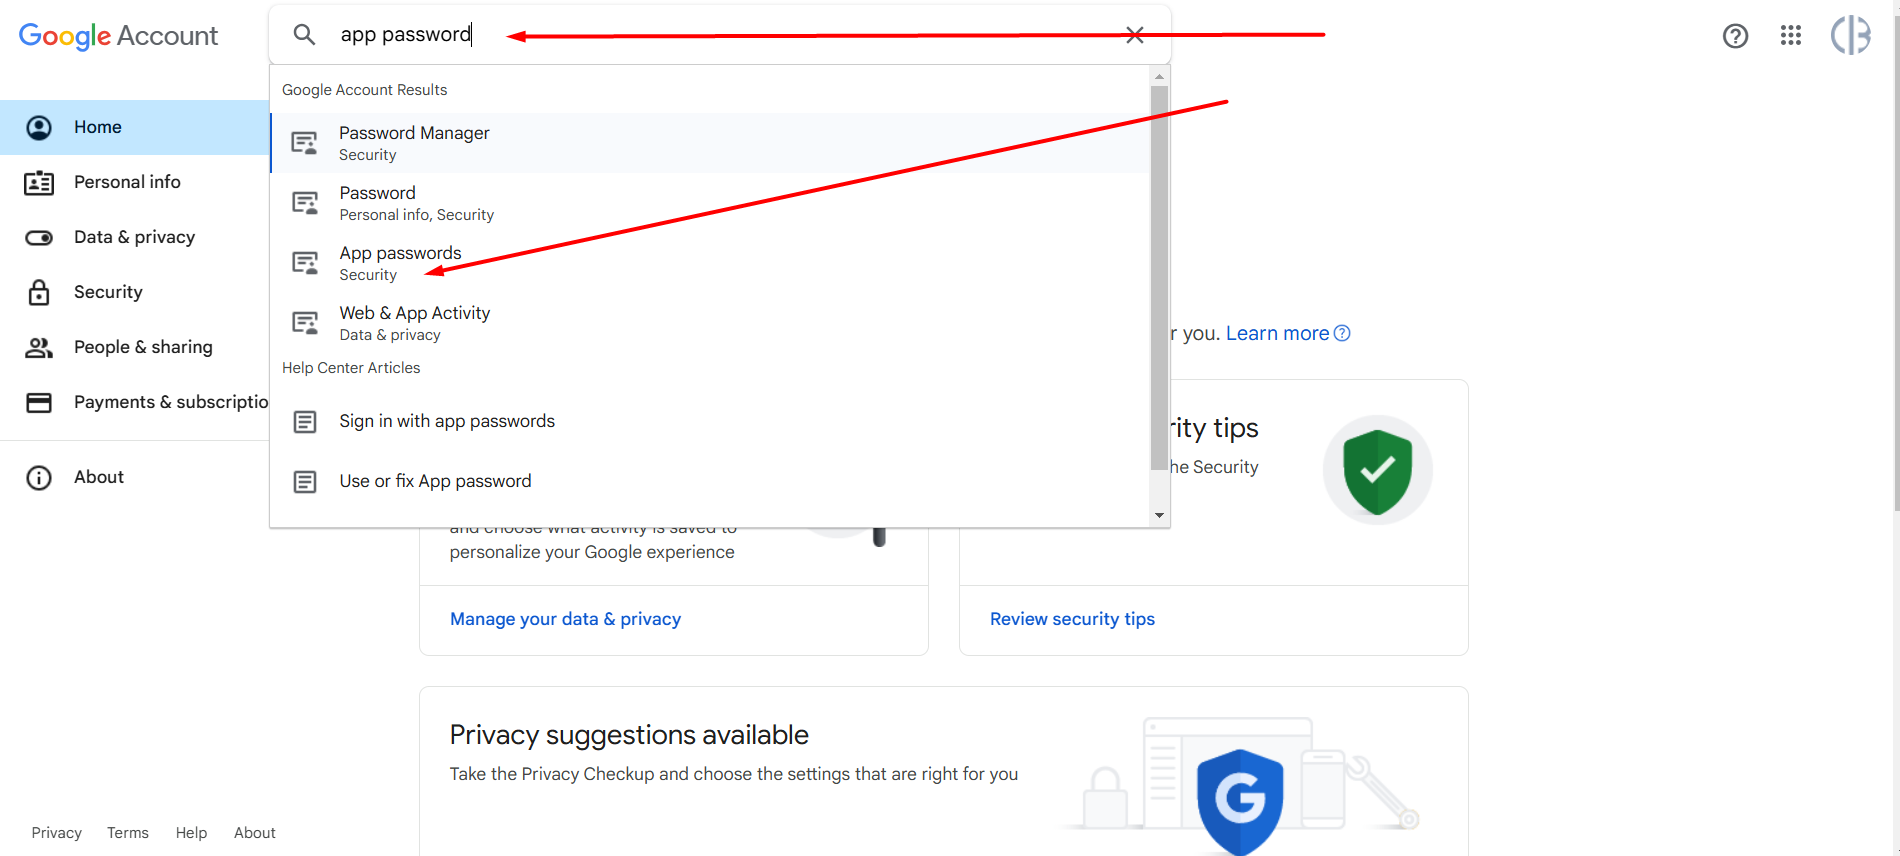
You will be redirected to the Gmail Account Settings home page. In the Gmail account settings page, search for “app password” in the search bar. You will find the App Password option in the dropdown menu, now just click on the App Password.
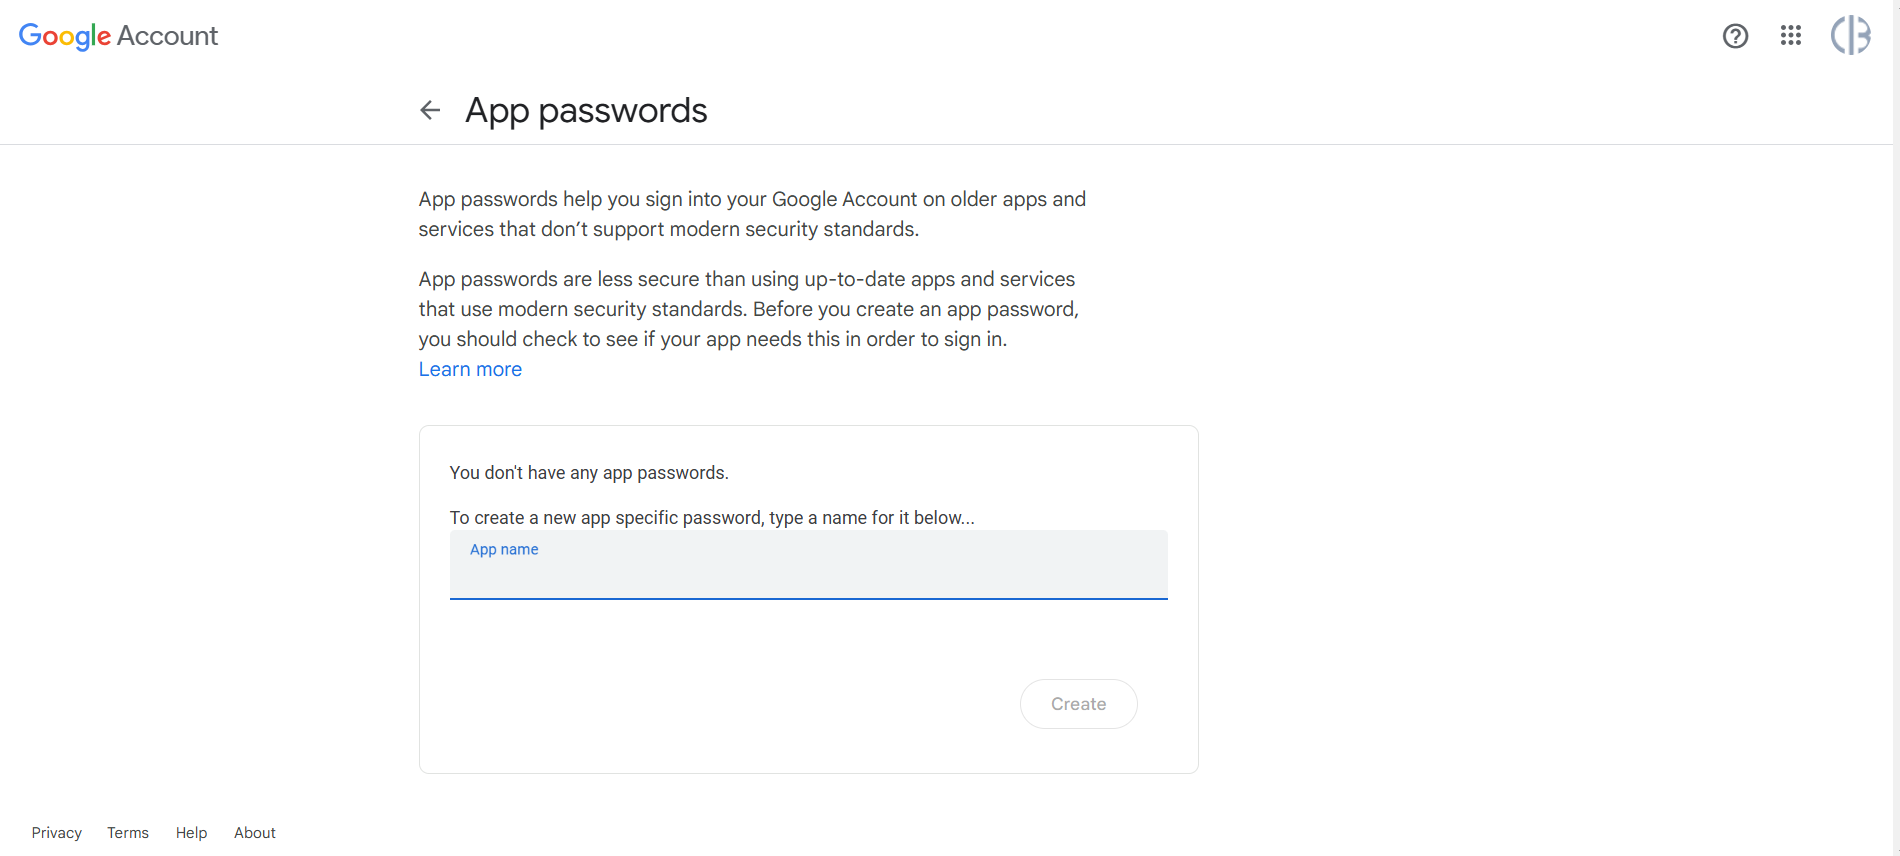
Now you are on the App Password page. Enter your desired app name when setting up SMTP for Classified Billing. Afterward, click on the “Create” button.
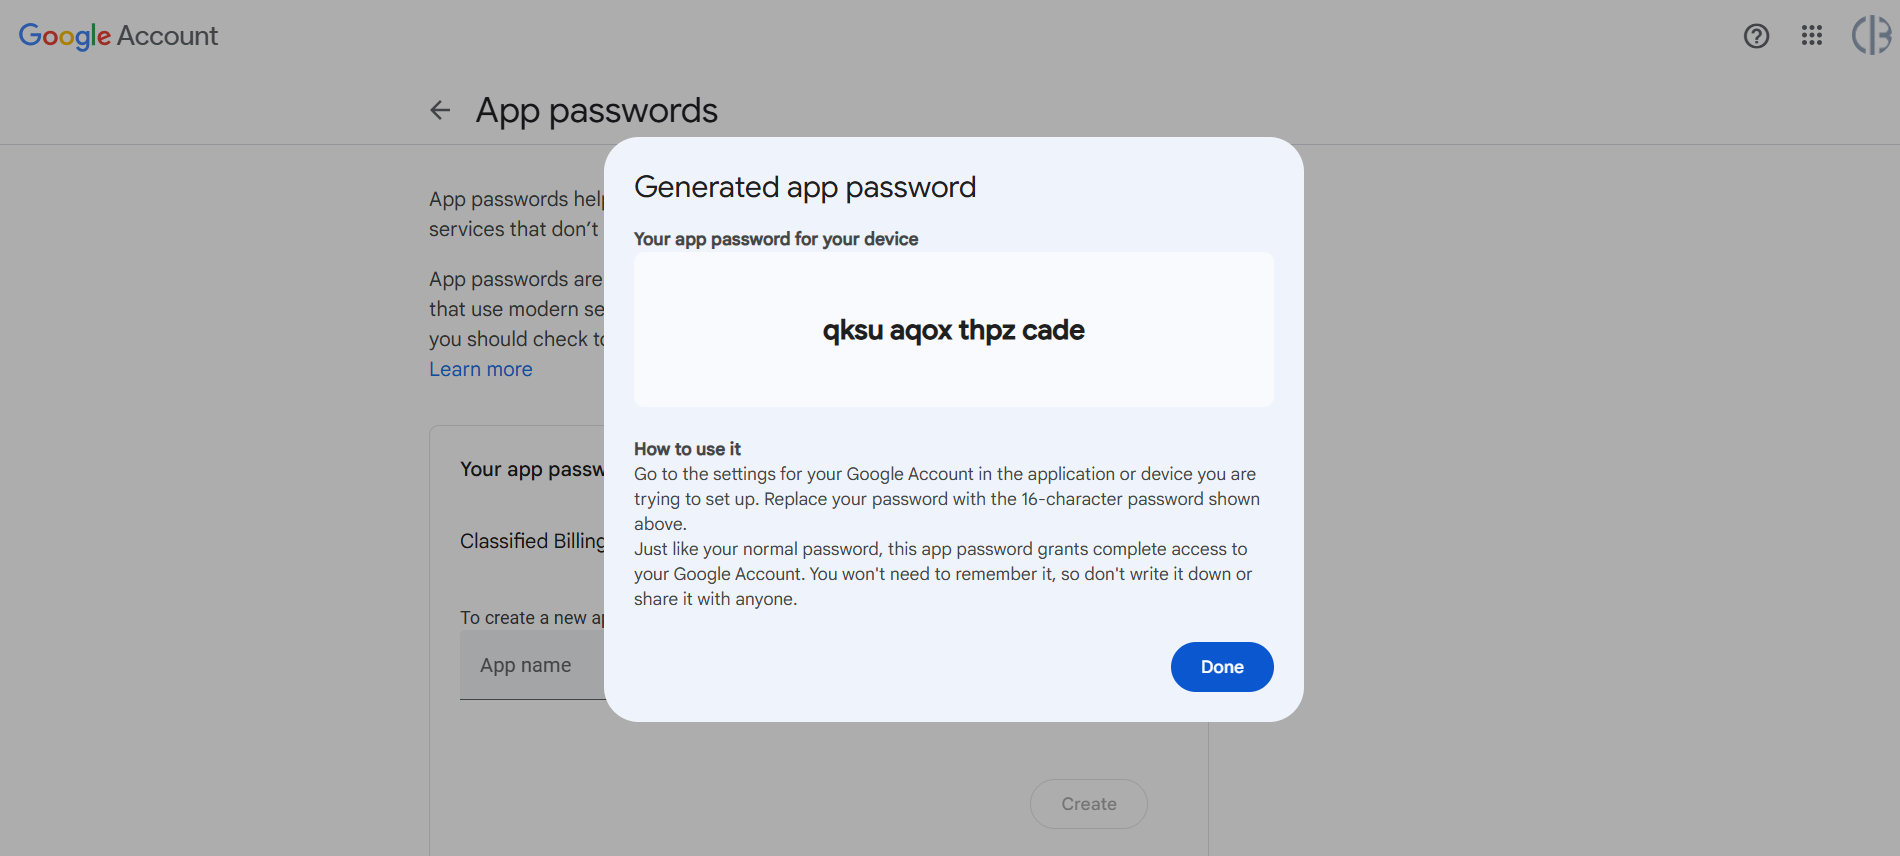
It will open a new popup with a 16-digit password, copy and save them to a note pad, and remove the blank spaces among the passwords.
Enter SSL in the Encryption field.
Now you have everything to fill the SMTP form so fill them properly like the screenshot below.
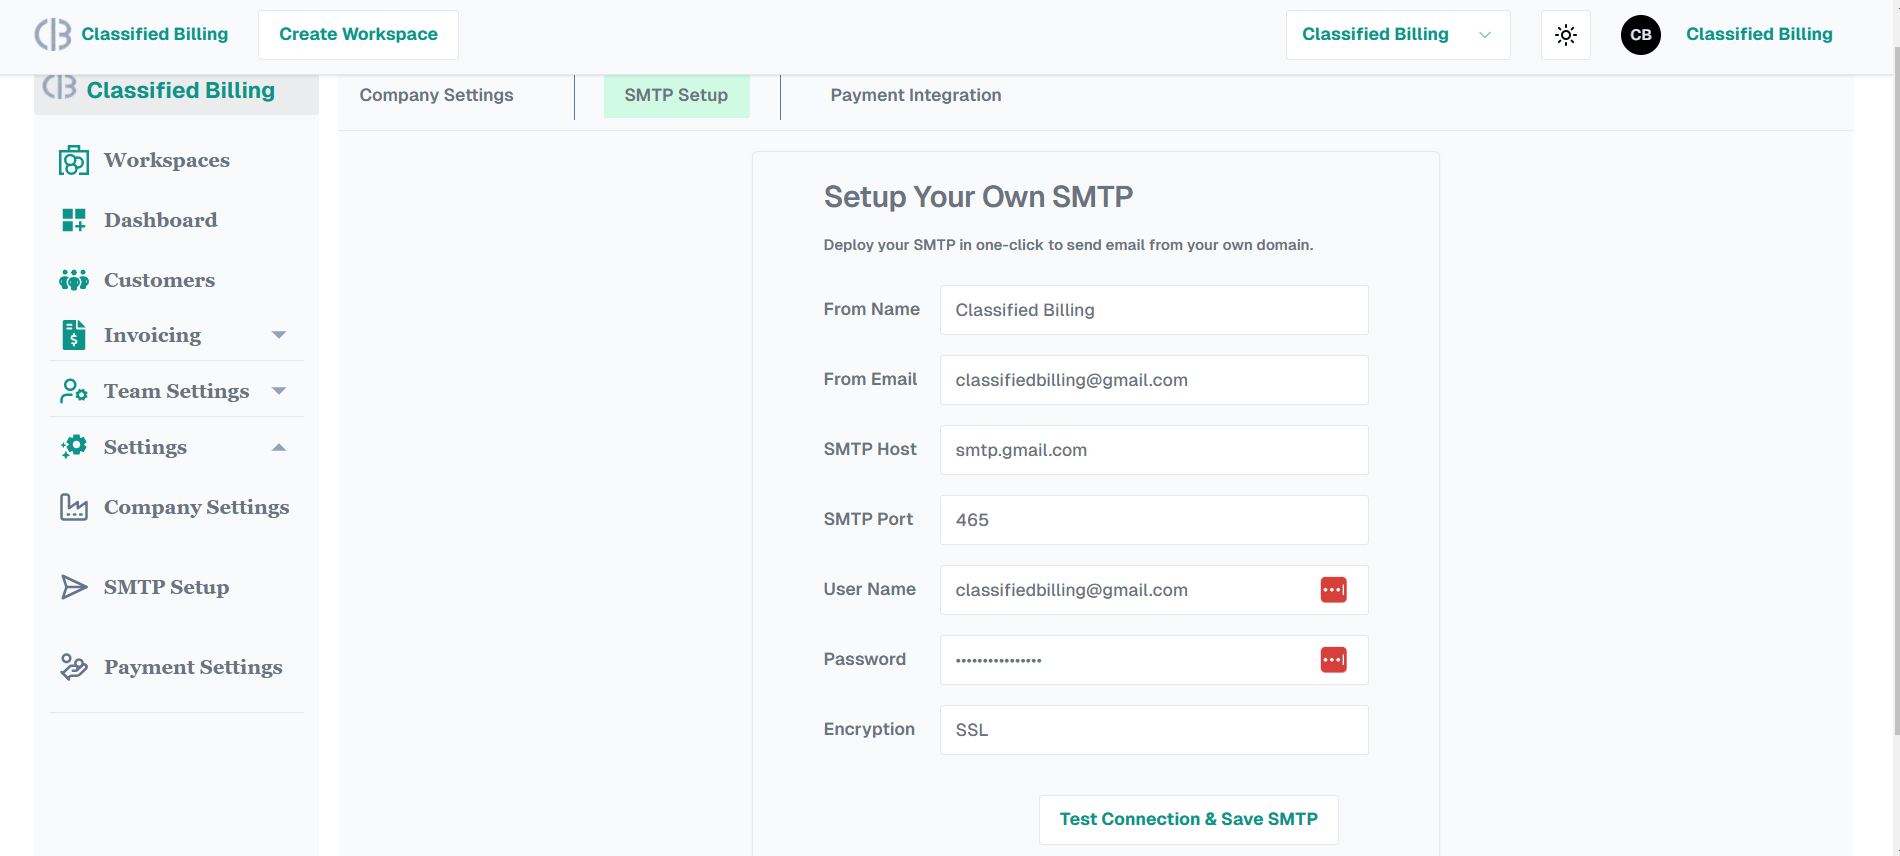
When everything is filled up with proper data, click on the Test Connection & Save SMTP button.
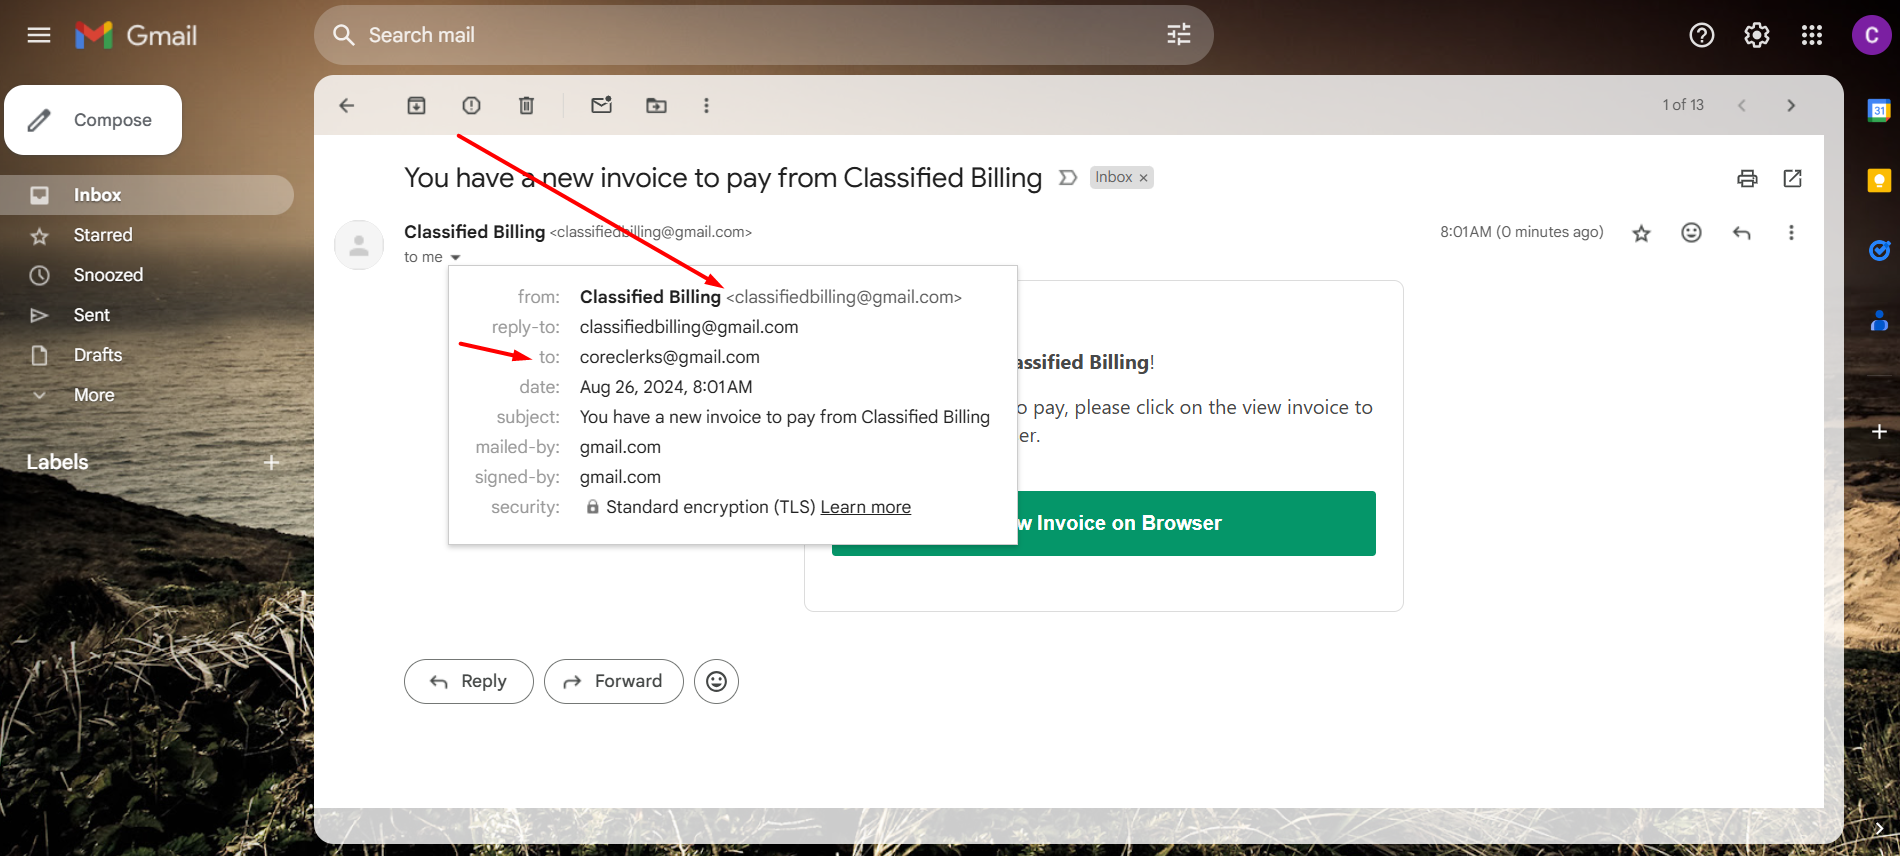
After verifying your SMTP details, the system will save them in the database. From then on, whenever you send an invoice to a customer, it will always use your own sender email.
Now you are done and here is the final proof.
Good luck to you and your business!


